Showing posts with label Instagram. Show all posts

Friday, May 13, 2016

How to break an image and upload as a stylish Grid in Instagram?

Instagram is a great tool for visual editing enthusiasts. It has varied options of predetermined editing formats and one can just choose one of them to make an image more appealing and professional. We can then either share with friends in various social media or keep it to be printed in a hard copy. 


Instagram also provides various tools to prepare a photo gallery to be presented/shared in other CMS-blogging platforms. We have shared following tutorials for preparation of a photo gallery using Instagram:
  1. How to link Blogger and Instagram via Instagram Badges? 
  2. How to share Instagram photos as a badge in Blogger?
  3. How to share Instagram photos in a WordPress Blog?
  4. How to share Instagram photos in Blogger Widget?
  5. How to share Instagram photos in a Blogger Page?
If you read above tutorials, you'll get convinced that Instagram indeed is a great useful tool for bloggers providing various methods of integrating photos with blogs. 

But in today's tutorial, we are going to show you a different method of uploading a photo in Instagram. It's a different method in a sense that you can break one image into different bits and upload them one-by-one. When all those bits get upload and view, they will form like collage and appear just like one image altogether. This sounds wonderful. Isn't it?

Let us get started. 

Do you have a photo ready to be uploaded in Instagram? If not, get one and keep it ready. But for this tutorial, I have chosen a wonderful photo of Her Majesty Queen Jetsen Pema Wangchuk. 


I can upload it as one image in my Instagram account. But for this tutorial specifically, I will break into pieces and upload piece-by-piece to appear like a wonderful collage. 


We know that the pattern of photo display of Instagram is 3 x N i.e 3 rows and n number of columns. But if you want to display the image in one display, we have to assume it as 3 x 4. This means one photo has to get divided into 12 squarely-pieces. 


I have divided into 12 square pieces. You can do this in MS-paint or any other photo editing software. But don't forget to use rulers. Otherwise, the original photo may get distorted. I have used Ms-paint. It's simple. 

Break the image into 3x4 in accordance with above pattern. If original image is square, you can do in 3x3. I have done in 3x4 as original image itself is rectangular. The only thing is, number of rows shouldn't be lower and higher than 3. 

Once above procedure is done, it's an uploading time. But as I already said, you must be careful at the time of uploading. We aren't uploading just one photo. We are instead uploading many photos to appear like one when viewed/displayed together. We have to upload piece-by-piece chronologically starting from the piece that is on the bottom right-hand side of the main photo. To help you, I have numbered something like below. You must follow my numbering pattern at the time of uploading those pieces.
     
You have to upload the piece '1' first and then piece '12' last. When all the pieces are completely upload and then view your Instagram profile, those upload pieces will form yet another collage of wonderful photo in your profile wall. 


Your collage should appear something in above if you have uploaded every piece in correct sequence. If you have either missed one piece or upload one twice or more or in wrong order, you'll not get the above collage. You can click my Instagram Account to view this in actual.
Your Turn
You can try this with another such wonderful photo. I can assure that it will be an absolute fun for you. Your Instagram profile will get beautified by manifolds. And if you also know any other tips to play with Instagram, please share with us in comment. We would love to learn your tips too. Thanks!


Thursday, October 15, 2015

How to link Blogger and Instagram via Instagram Badges?

We have learned how to share Instagram photos as a slider in blog's page and also in sidebar. Hope you have loved them and even implemented in your blog. But today let us make it simple and learn how to link your Instagram account profile with your blog via Instagram badge.
                  
We can also directly link your blog with instagram account by giving link in one of the page tabs. This appears not much professional. So it's not being advised.

But today let us learn how to share Instagram Badge in side bar and integrate blog and Instagram. This will really boost the blog's traffic. If you're photography blogger, linking of Instagram with your blog is like necessity. 
  1. Login to your blog
  2. Select the blog (if you have many)
  3. Click on layout
  4. Click on Add a Gadget on side bar
  5. Scroll down
  6. Select HTML/JavaScript
  7. Keep the title blank
  8. In content paste the given code
<style>.ig-b- { display: inline-block; }
.ig-b- img { visibility: hidden; }
.ig-b-:hover { background-position: 0 -60px; } .ig-b-:active { background-position: 0 -120px; }
.ig-b-v-24 { width: 137px; height: 24px; background: url(//badges.instagram.com/static/images/ig-badge-view-sprite-24.png) no-repeat 0 0; }
@media only screen and (-webkit-min-device-pixel-ratio: 2), only screen and (min--moz-device-pixel-ratio: 2), only screen and (-o-min-device-pixel-ratio: 2 / 1), only screen and (min-device-pixel-ratio: 2), only screen and (min-resolution: 192dpi), only screen and (min-resolution: 2dppx) {
.ig-b-v-24 { background-image: url(//badges.instagram.com/static/images/ig-badge-view-sprite-24@2x.png); background-size: 160px 178px; } }</style>
<a href="http://instagram.com/INSTAGRAM USERNAME?ref=badge" class="ig-b- ig-b-v-24"><img src="//badges.instagram.com/static/images/ig-badge-view-24.png" alt="Instagram" /></a>
In above code, replace instagram username with your own instagram username. Once it's done, click on Save and you're done. You may also change the location where this badge can be displayed i.e either on side-bar or footer frame of your blog.

Tuesday, August 25, 2015

How to share Instagram photos as a Badge in Blogger

We have learned how to share your Instagram photos in your blog as a page and as a sidebar Gadget. And people who maintain blog in WordPress, we have learned how to share Instagram photos in its sidebar Widget.

In this tutorial, for making more choices in sharing Instagram photos in blogger, let us learn how to share them by making an external link at the sidebar by linking free Instagram Badge.


We first need Instagram Badge in HTML form. So let us scoop through following steps and get the badge:
  1. Login to your Instagram Account
  2. Click on your username
  3. Click on Edit Profile
  4. Scroll down 
  5. Click on Badges
  6. Select the design for your badge
  7. Copy the HTML code
We have Instagram Badge ready. Now we have to install that badge in our blog as a sidebar Gadget. To do this, steps are:
  1. Login to your blog
  2. Choose the blog (if you have many)
  3. Click on Layout
  4. Click on Add a Gadget
  5. Choose HMTL/JavaScript
  6. Keep the title blank
  7. On Content, paste Instagram Badge Code
  8. Click Save
You have successfully shared your Instagram photos in your blog sidebar. To ensure things went well, open your blog once more and see if Instagram Badge has appeared. If it's there, you have done correctly. Readers can just click on that badge to view all your Instagram Photos. Cheers!

Monday, August 24, 2015

How to share Instagram photos in wordpress Blog

If you're blogging in WordPress, it's a good news that WordPress now allows sharing of your Instagram Photos from the widget. But as one of the most popular restrictions of wordpress, it doesn't allow much customization. You don't have a choice either to show it as slider or grid. It allows only in fixed grid pattern. 

If you wants to share your Instagram photos in your WordPress blog, please follow the given steps to successfully share your photos: 


Login to your WordPress Blog>Click on My Site>Click on WP Admin>Scroll down>Click on Appearance>Click on Widget>On the Available Widget, click on Instagram>Drag and drop on the sidebar area.


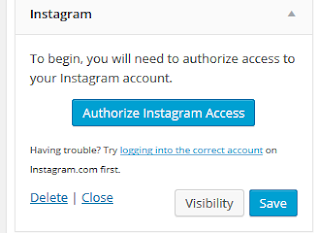
Once it appears in sidebar widget area, Click on Authorize Instagram Access>Customize number of images and layout and then click on Save to complete the sharing procedures>Click on Close>Open your blog once more and see those Instagram photos being shared in your widget. It's wonderful. Keep blogging. Cheers!

How to share Instagram photos in Blogger Widget

In our earlier tutorial, you have learned how to share Instagram photos through your blogger page. Hope you have successfully got it shared beautifully. But today let us learn different mode of sharing Instagram photos - through a widget/gadget in blogging. Are you ready? 

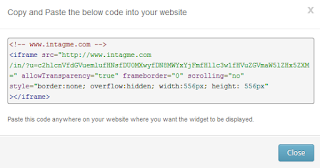
Click on Instagram Widget>Give your Instagram username>Choose slideshow/Grid>Change Thumbnail>Choose Yes/No Photo Border>Change Background Color>Choose Yes/No sharing buttons>Click on preview to see>If you think it will fit your blog page area, click X & click on Get Code>Copy (Ctrl+C) the Code


You have now your Instagram photos in that codes ready to be shared. Unlike in previous post, this time, open the layout of your blog>Click on Add a Gadget>Choose HTML/JavaScript>Give the Title>In content, paste earlier Codes>Click Save. Then you're done!


But you relocate its position wherever you wants based on the design of your blog. Usually many advise to keep it in sidebar only - it not only make navigation easier but also appears suitable there. Hope you got it.

We have completed two ways of sharing Instagram Photos in Blogger. Please remain in our circle to learn how to share them as an External Link

Friday, August 21, 2015

How to share your instagram photos in Blogger Page

Do you have Instagram Account? Do you have a list of wonderful photos you have taken and uploaded there. And don't you want to move little ahead and share those photos to a little larger audience - your blogging community. 

If the answer you have is only yes in all above questions, then I think it's a right time you share your Instagram photos to larger viewers through your blog. There are indeed three ways to share your Instagram photos through your blog:
  1. In the form of blog page
  2. In the form of widget/Gadget
  3. In the form of external link.
But today let us learn how to share them through your blog as one of your pages. The pattern can be either slide show or static Grid. Whichever you choose, the steps will remain same:

Click on Instagram Widget>Give your Instagram username>Choose slideshow/Grid>Change Thumbnail>Choose Yes/No Photo Border>Change Background Color>Choose Yes/No sharing buttons>Click on preview to see>If you think it will fit your blog page area, click X & click on Get Code>Copy (Ctrl+C) the Code

You have your Instagram photos ready to be shared. Now open your blog. If already have a page/tab for photo sharing like Gallery, you can click on its edit and paste the above code in its HTML view. 

If you don't have Gallery Page created: Open your blog>Click on Pages>Click on New Page>Give Page title>Click on HTML>In that white area, paste above code>Click Publish>See whether your photos are getting displayed by opening your blog and clicking on that particular page. 

If those photos are there and they are also as you wanted, you can relax for having added that into your blog. If either thumbnail sizes, background, widget sizes aren't good, then you can start it all over again-which is quite easy. Have fun blogging. Cheers!

Please remain in our circle to read how you can share Instagram photos in the form of widget and also as an external link.

Related Posts Plugin for WordPress, Blogger...